Owning a Mac can improve many different aspects of your daily life. This is why this computer is chosen by so many people: graphic designers, illustrators, musicians, and many other professionals. Macs have great tools and are very intuitive, which helps to get the work done faster and more efficiently.
But of course, there is a downside to every computer. If you do not take care of your Mac and do not have an understanding of what kind of actions are unhealthy for your computer, eventually, it will become slower. And who wants a slow Mac, right? These computers are often valued for their speed, so there’s gotta be a way to fix it.
And there is. Actually, there is more than one way of speeding up your Mac, and you will reach the best performance only if you do everything that is in your will. That is why, today, we want to share the most effective ways to speed up a Mac.
Method #1 – Remove Leftover Junk From Unused Apps
First of all, you should remove the apps that you do not use. We all have to admit that we have downloaded such apps that we have not even opened once. And it could sometimes surprise you how the simplest apps can take up so much storage space on your computer. Mostly it is because of high-quality graphics.
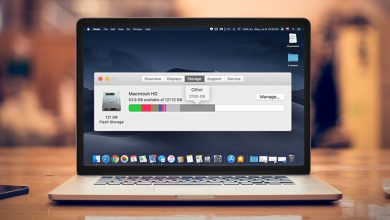
To open your eyes and see how much space your apps are taking up on the Mac, you have to click on the Apple icon in the left top corner of your screen. Then, click About this Mac, then choose Storage, and you will see how much space your apps are using.
But apps create additional files that are left after you delete the applications. To check that, you will need to download a specialized app because it is almost impossible to find and delete those files manually. But they might still be using a lot of space, so it is highly recommended to delete them.
Method #2 – Update Your Mac
It is a high possibility that you, like many other people around the world, have some Mac updates uninstalled and have been postponing it for quite a while. And it is a common thing – when the Mac notifies us about the new update, we are usually busy doing something else. And later on, it is completely normal to forget about it.
But you need to remind yourself that these macOS updates are very important for the entire performance of your Mac. Updates usually include all kinds of performance improvements, bug fixes, and other things that are important for the speed and effectiveness of the computer.
If you postponed some updates because you did not have time to install them, you could always find them by going to the App Store and clicking on the Updates section.
Method #3 – Check Activity Monitor
Checking the Activity Monitor can be a lot of help because there might be some app that you do not use too often, but they are still running in the background and using both significant energy and slowing down your Mac.
To open the Activity Monitor, use your Magic Keyboard and click Command+Space. Then, a search window will appear. Type in Activity Monitor in the search window and click on the icon.
Method #4 – Review the Startup Items
Every Mac has at least a few apps that launch automatically once the computer is turned on. And you should not worry about it too much because usually when you install a new app and agree with the terms and conditions without reading them, there is often a default setting to add the app to the startup items.
Of course, if you see an app launching each time you start your Mac, and you do not remember installing it, then probably a malware scan would be the proper thing to do.
It is okay to have a few startup items if you really use those apps from the moment you turn on your computer. But if there are too many unnecessary apps, they will make the startup much slower. To manage these items, go to System Preferences, then Users & Groups, then Check for your User Name. Here, you can review your login items and remove the ones you are not planning to use each time when you start your Mac.


